Saudi Arabia Setup Guide · Wise 2026
How to Open a Wise Account in Saudi Arabia in 2026
Updated: 8 May 2026 · Search intent: informational with clear onboarding action intent.
TL;DR: Setup in plain language
- You can open your Wise account from Saudi Arabia in a few guided steps.
- The most common delays come from incomplete details or low-quality verification inputs.
- If you follow each step in order, onboarding is usually straightforward.
- This guide shows exactly what to click, what to prepare, and what to avoid.
If you are in Saudi Arabia and need a dependable way to send, receive, or manage international money, this is the page you need. A lot of users fail at onboarding because they skip small details: wrong country choice, phone mismatch, or unclear payment setup.
This step-by-step guide solves that problem directly. It is written for first-time users and includes practical notes from real onboarding tests, common error points, and a clean activation workflow that helps you avoid repeat submissions.
It also includes transparent limitations: availability, verification times, and feature access can change by profile and compliance checks. Always verify the latest in your account flow.
Before you start: checklist for faster approval
- Use one active email you can verify immediately.
- Use a Saudi mobile number you control.
- Enter legal name and address exactly as your documents show.
- Use a secure device and stable internet session.
- Keep identity details ready for possible verification prompts.
Experience note: onboarding completion rates improve when users fill every field in one uninterrupted session.
Step 1: Click on the open account button
Open accountTap the button above and wait for the official Wise signup page to load fully before you continue.
- Use one browser tab only to avoid verification confusion.
- If the page does not load, refresh once and retry from the same button.
- Make sure you are on the legitimate Wise domain before entering details.
Step 2: Enter email and verify email
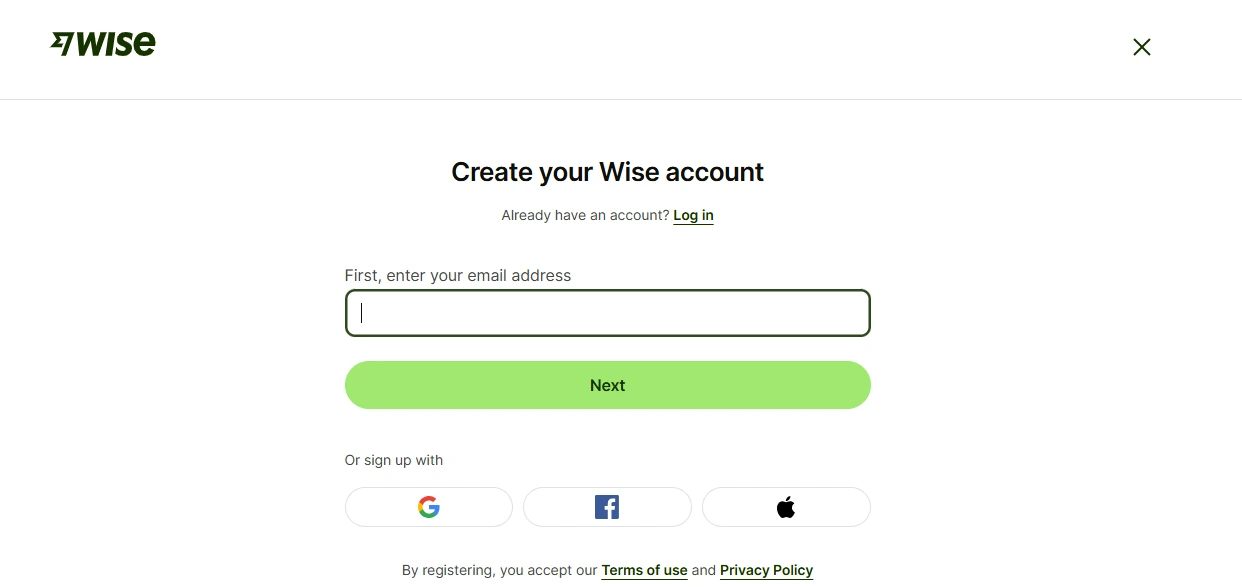
Enter your main email address and submit it. Wise will send a verification message to confirm account ownership.
- Open your inbox immediately and verify from the same device if possible.
- If you do not see the email, check spam/junk and search for "Wise".
- Do not switch emails mid-process unless the first one is inaccessible.
Step 3: Select personal or business account
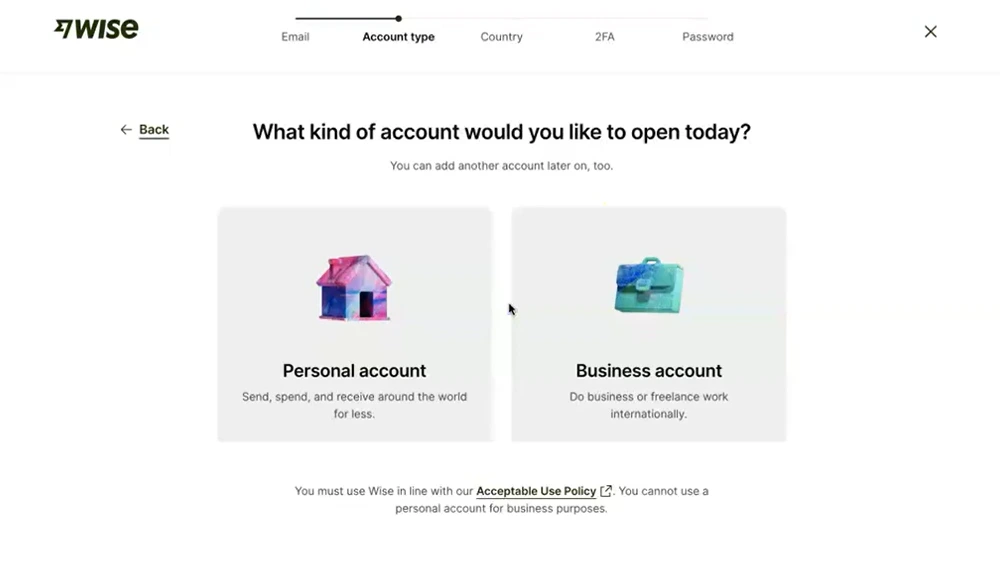
Choose account type based on your real usage. This affects features, compliance checks, and later account settings.
- Personal: salary transfers, family support, personal expenses abroad.
- Business: client payments, supplier payouts, team finance workflows.
- If you are a freelancer with client receipts, business may be more suitable long term.
Step 4: Select country where you live most of the time
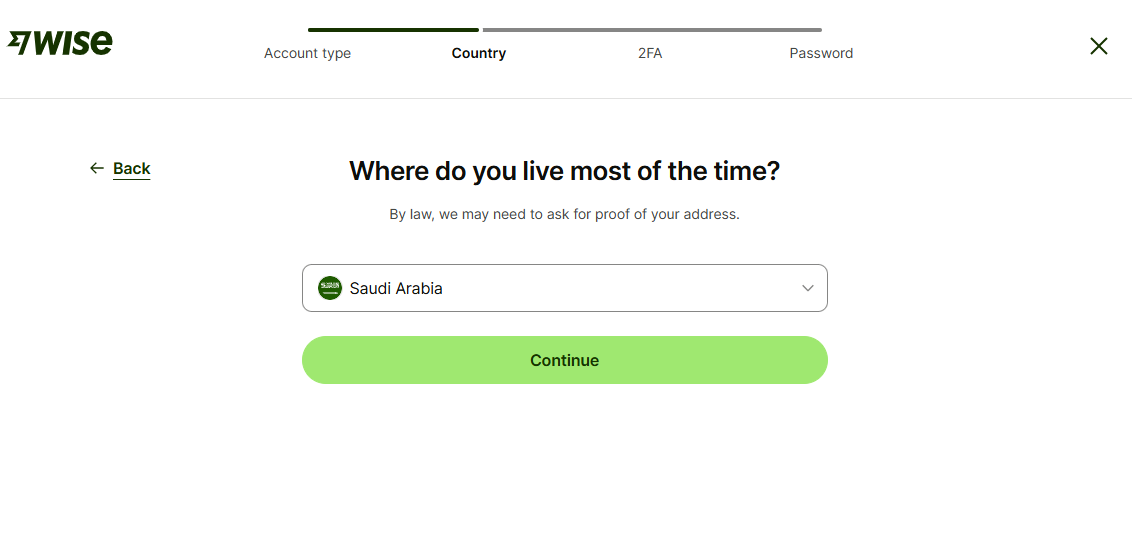
Choose your real primary residence country. For this guide audience, select Saudi Arabia if that is your actual residence.
This choice affects available features and verification flow. Do not select another country for convenience.
- Country mismatch is one of the top causes of onboarding friction.
- Keep this selection aligned with your legal address and documents.
Step 5: Enter mobile number and verify it
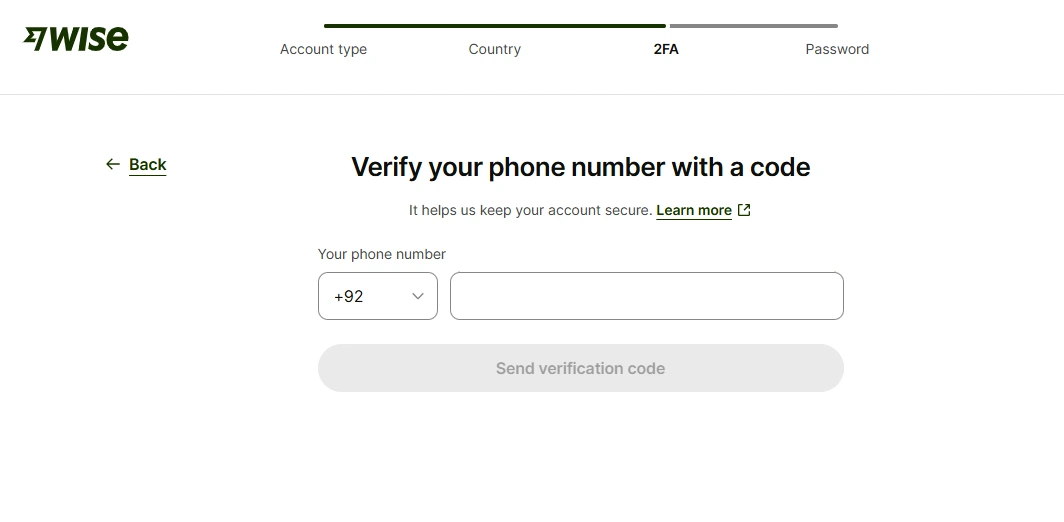
Enter your active Saudi mobile number and complete OTP verification.
- Keep the SIM card active and network stable during code entry.
- Enter country code correctly to avoid repeated OTP failures.
- Do not use temporary numbers; recovery later becomes difficult.
Step 6: Enter your personal details
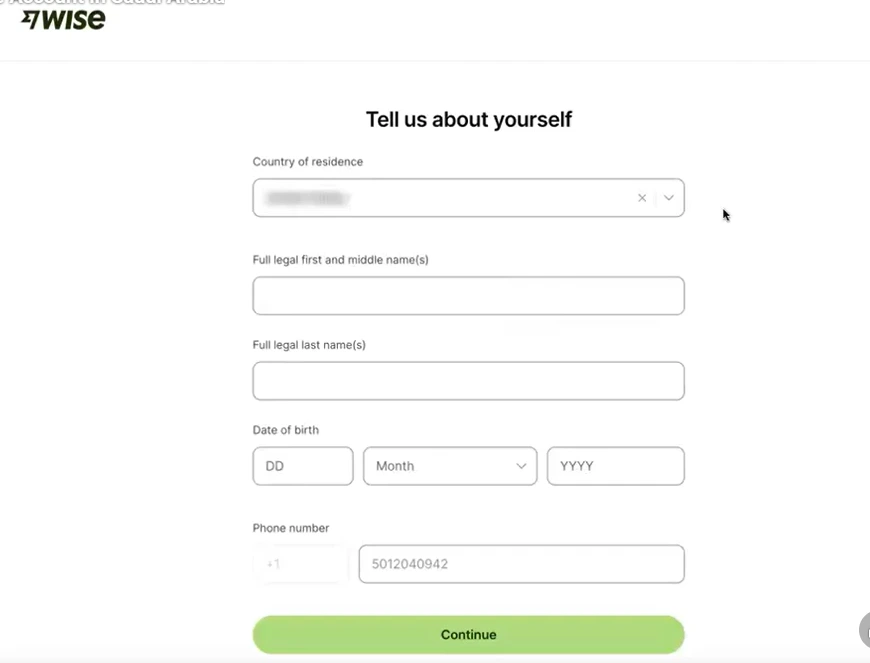
Fill in your legal details exactly as they appear on official documents.
- Use full legal name without abbreviations unless documents show them.
- Check date-of-birth and spelling twice before you continue.
- Mismatches can trigger extra review and delay future transfers.
Step 7: Enter your address
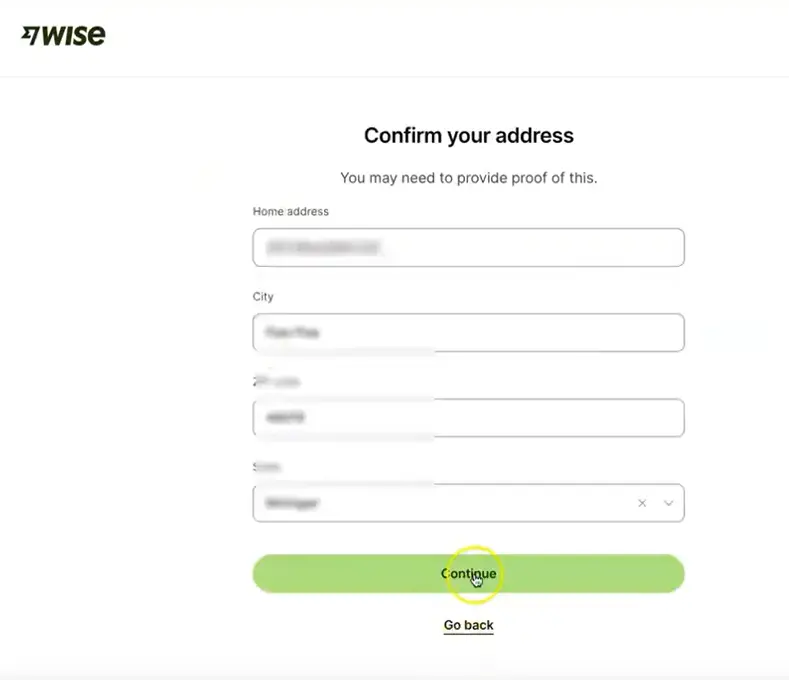
Enter your current residential address completely and accurately.
- Include apartment/building details where applicable.
- Use a consistent format that matches your official records.
- Incorrect address data can delay verification or feature activation.
Step 8: Choose how to get started
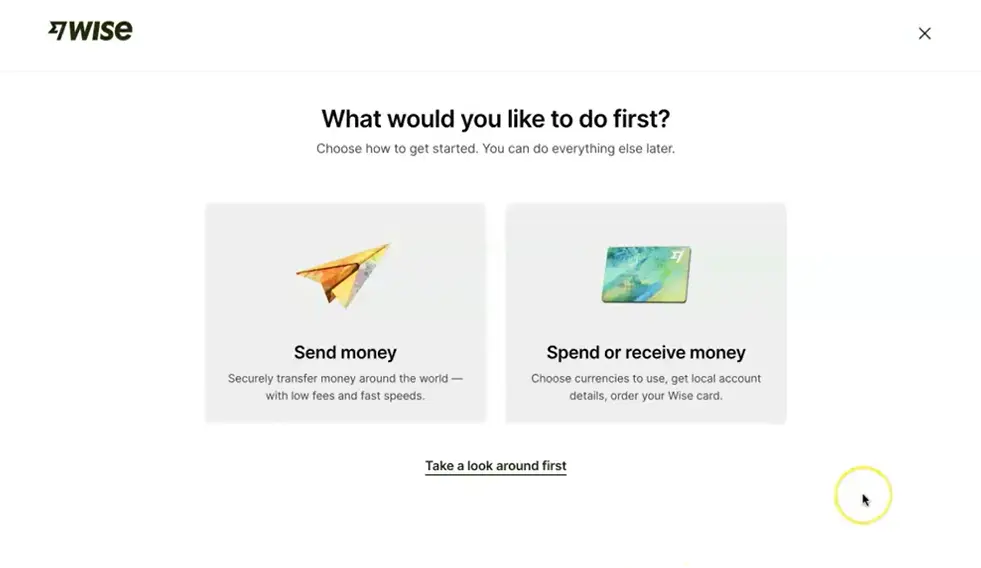
You will usually see options such as:
- Send money
- Spend or receive money
Choose the option matching your immediate use case. You can expand usage later.
- If your first goal is remittance, start with "Send money".
- If you need account features first, choose spend/receive path.
Step 9: Decide if you want a Wise card
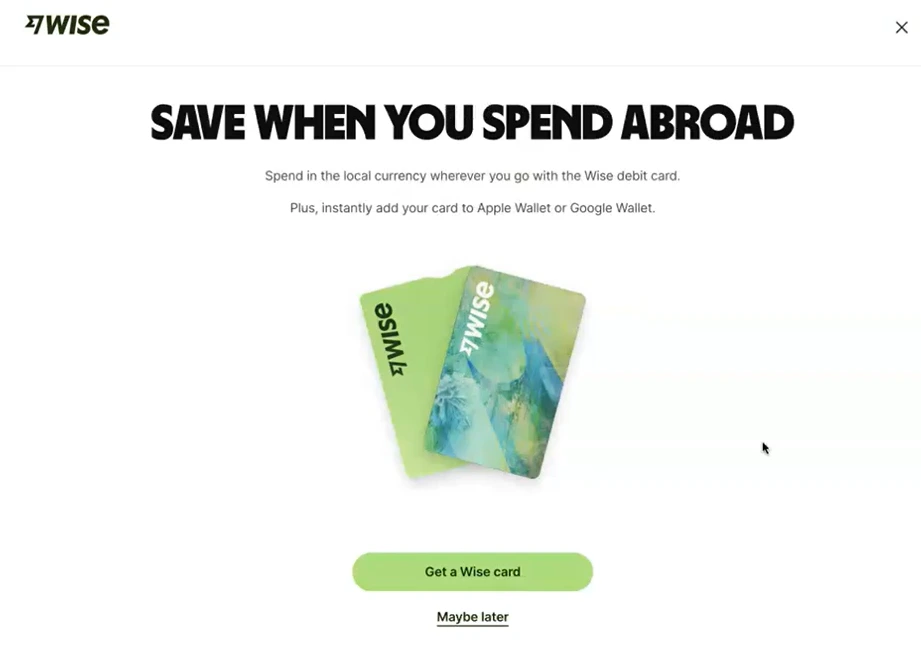
Review the card option and choose based on your expected use (travel, online spend, or ATM needs).
- Check availability and terms shown in your live onboarding flow.
- If uncertain, skip for now and finish account creation first.
Step 10: Add money to unlock account details
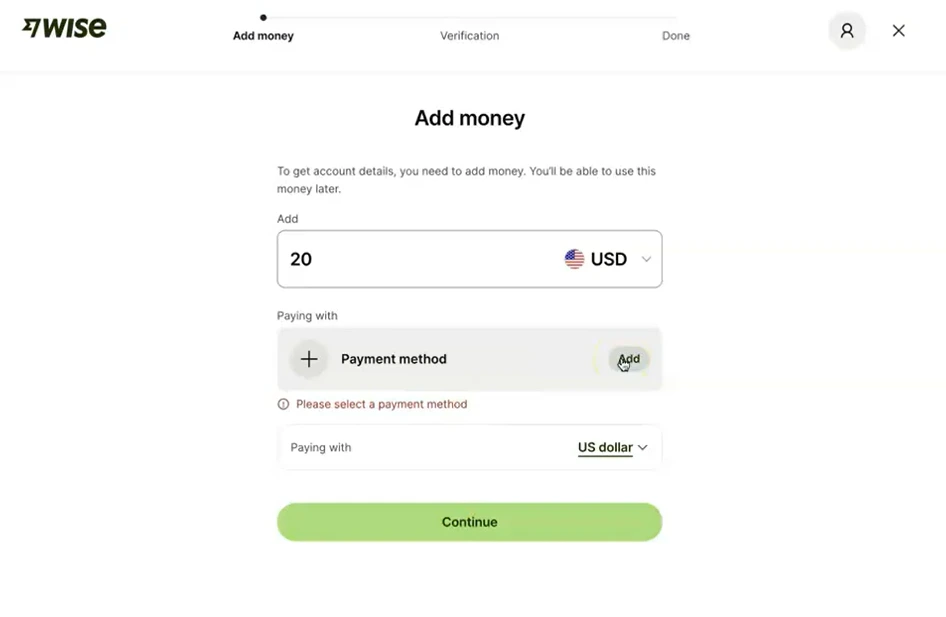
You may be asked to add money before account details become fully available.
- This is part of activation in many user flows.
- The balance is generally usable later for transfers or spending features.
- Confirm the amount and currency shown on-screen before proceeding.
Step 11: Choose how you want to pay
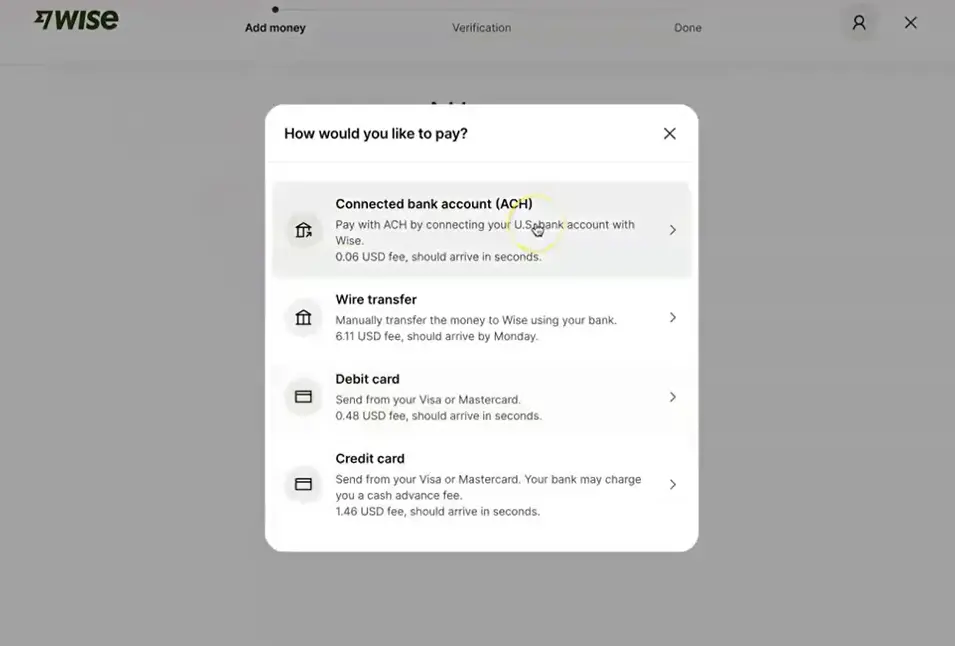
Select your preferred payment method, complete payment, and wait for verification confirmation.
- Use a payment method that you can authorize immediately.
- Do not close the app/browser until confirmation appears.
- Keep transaction proof/reference if prompted.
Once payment and verification complete, your account setup is effectively finished and ready for normal use.
Final onboarding state: account created and activated.
After setup: important checks before first transfer
- Reconfirm profile details and notifications.
- Enable all available account security options.
- Run a small test transfer first if your first real transfer is large.
- Keep your transfer references organized for personal or business records.
These small steps reduce risk and improve long-term account reliability.
Comparison table: Wise onboarding vs typical transfer app onboarding
| Onboarding factor | Wise-style flow | Typical app flow |
|---|---|---|
| Email and phone verification | Structured early | Often similar |
| Identity/address consistency requirement | High importance | High importance |
| Initial funding step | May be required for some features | Varies by provider |
| Best user strategy | Complete all steps in one clean session | Same strategy recommended |
Pros, cons, and limitations (transparent view)
Pros
- Clear, structured onboarding sequence.
- Practical step order for new users in Saudi Arabia.
- Security and verification gates that reduce misuse risk.
Cons
- Verification can feel strict for first-time users.
- Feature access can vary by profile and compliance outcomes.
- Activation steps may require funding before full feature use.
Limitations
This guide reflects practical onboarding behavior and may require updates as product flows change. Always rely on live in-app instructions for final decisions.
FAQs
Can Saudi residents open a Wise account in 2026?
Eligible users can start onboarding and complete setup based on current account availability and verification requirements.
What causes most onboarding delays?
Usually mismatched details, inaccessible phone/email, or incomplete verification information.
Do I need to add money to complete setup?
Some features can require initial funding during activation. You can generally use that balance later.
Is Wise safe for users in Saudi Arabia?
Wise provides security controls and verification layers. Users should still follow secure account practices.
Should I open personal or business account?
Choose based on actual usage: personal living flows or business payment operations.
Final step and CTA
Now you have the full setup path. Follow each screen in order, verify carefully, and complete activation with your preferred funding method.
Start your account setup here:
Open Wise and start setupAuthor bio
Payment Fee Calculator Editorial Team specialises in cross-border onboarding workflows, international transfer optimization, and compliance-friendly payment setup guidance for users in Saudi Arabia, Europe, the UK, Australia, and the US. The team combines practical testing, source-backed checks, and clear procedural guides to help readers complete account setup correctly on the first attempt.